

SSO configuration with AWS Redshift using Okta


In the ever-evolving landscape of cloud computing, enterprises are increasingly turning to streamlined and secure identity management solutions to enhance access control and user experience. One such powerful alliance is the integration of Single Sign-On (SSO) capabilities with Amazon Redshift, a fully managed data warehouse service in the AWS ecosystem. In this article, we delve into the seamless convergence of Okta, a leading identity and access management platform, with Amazon Redshift, paving the way for a unified and efficient authentication experience.
Imagine a world where your Redshift data warehouse users access their data with a single click, without juggling multiple credentials or compromising security, that’s what we are looking to do now.
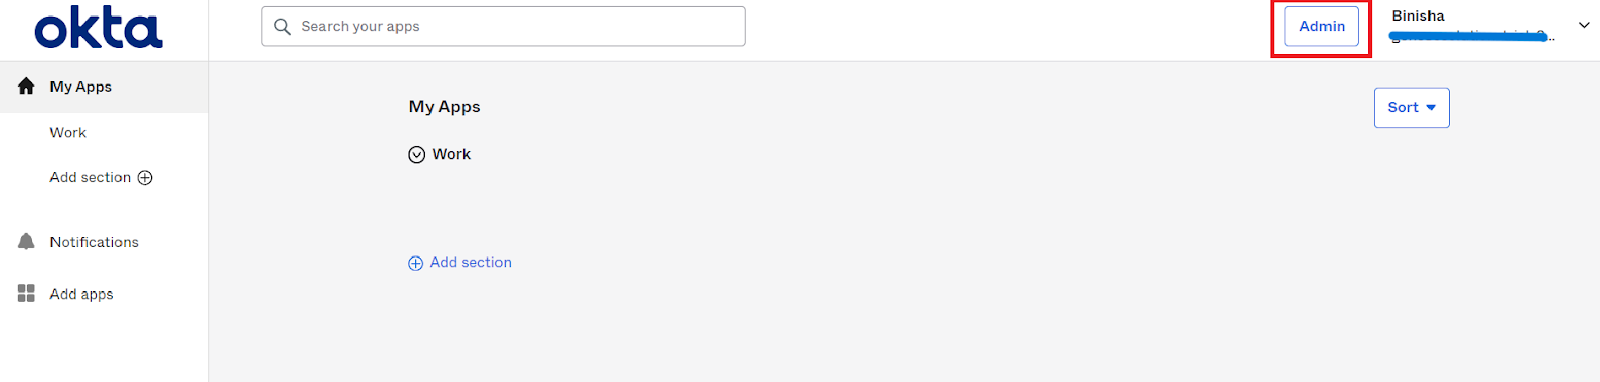
First step is to create an account in Okta and then click the Admin button at the top navigation bar. Okta is an identity provider(IdP), which is a service that manages and provides secure and authenticated access to digital resources for users. There are many alternatives to Okta such as Ping, Microsoft Azure AD, etc.
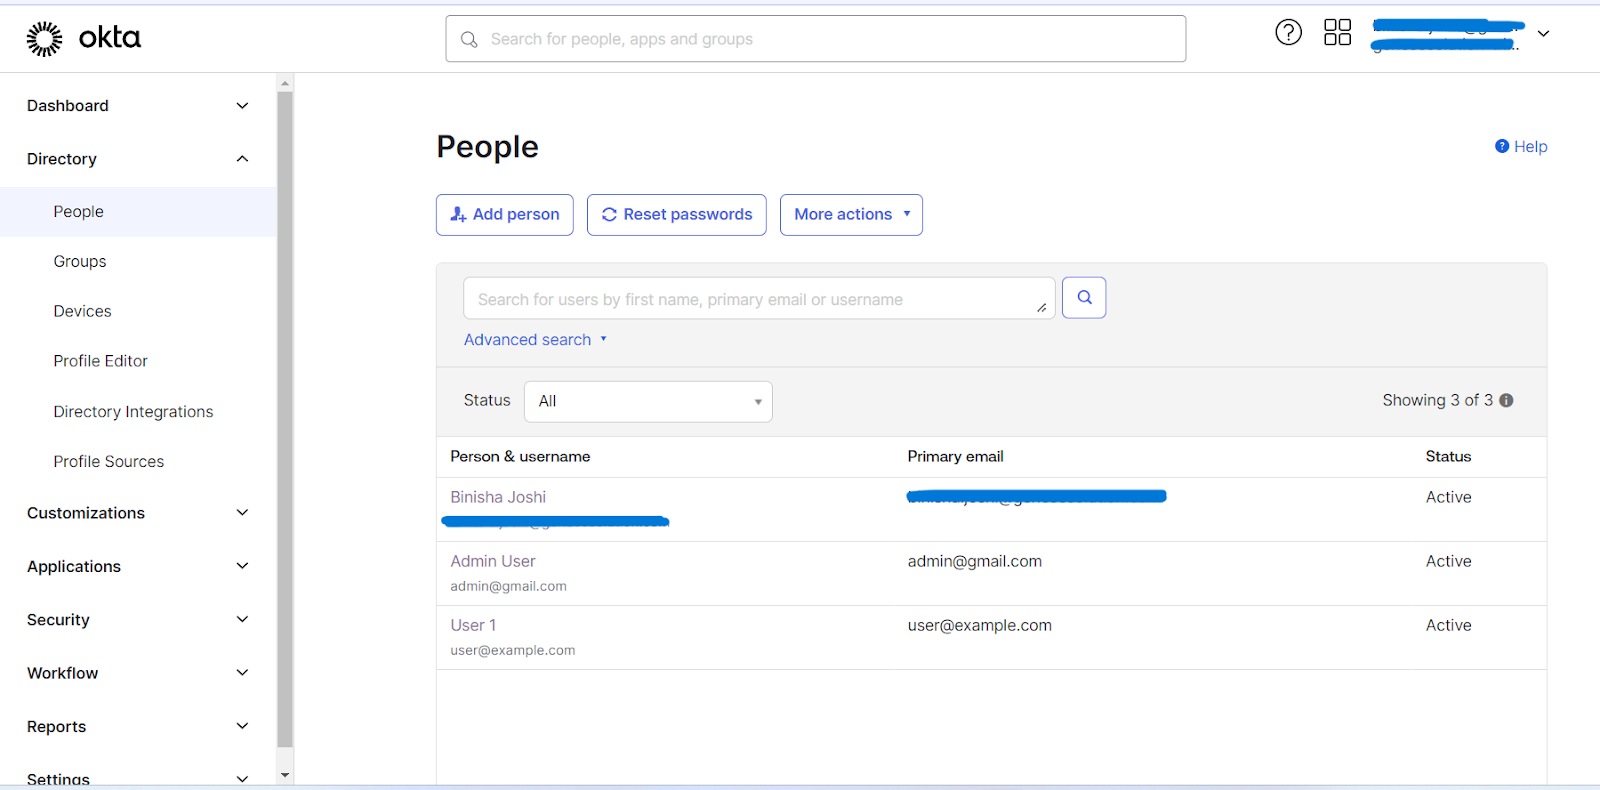
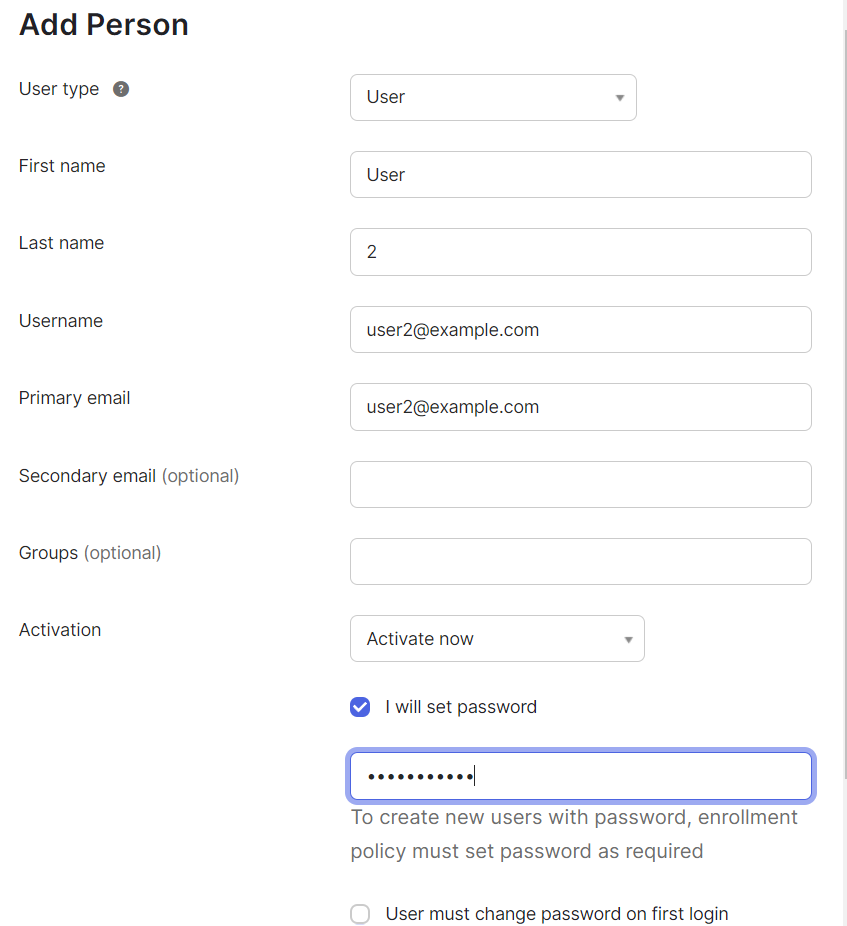
Now navigate to the People tab from the left sidebar, then Add person to create users in Okta.
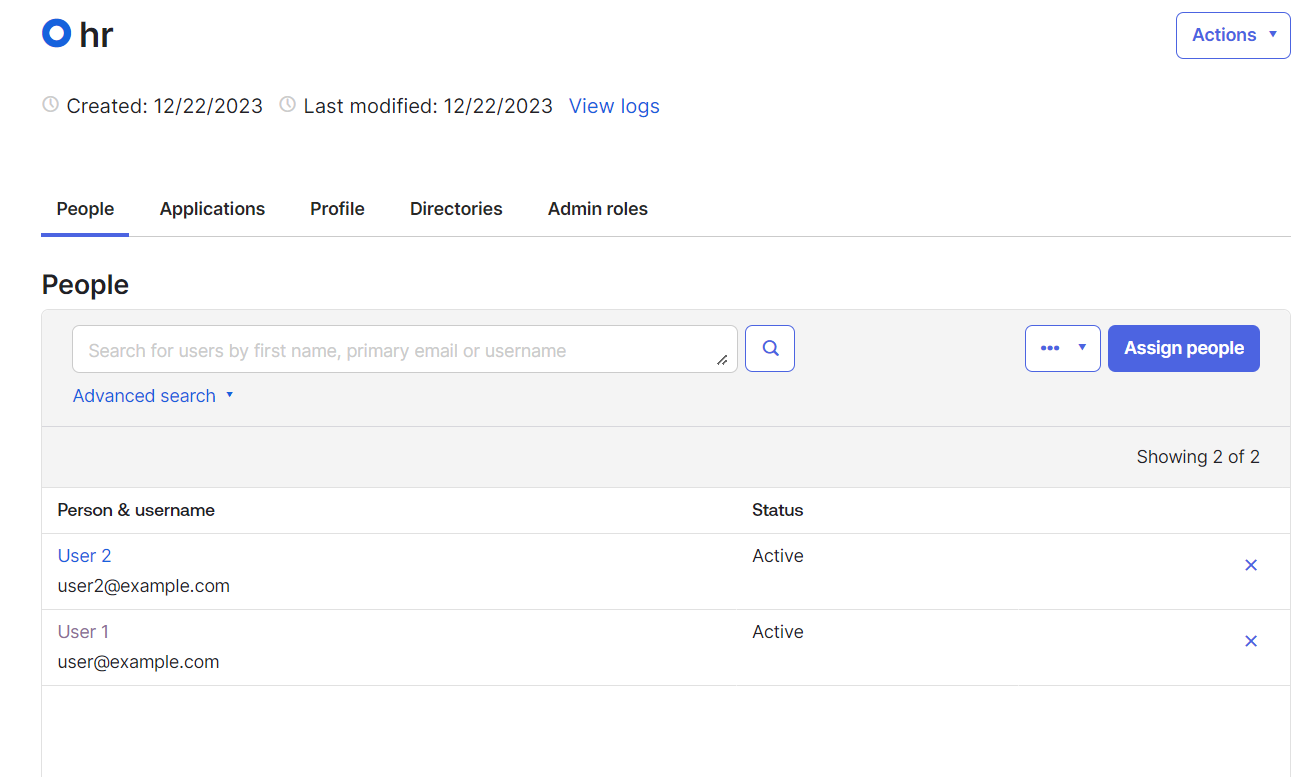
Then go to Groups under the People and create different groups. I have created two groups: admin and hr.

Now, let's add the users to these groups. Click on the group name and then select Assign people, to add the users to the group.
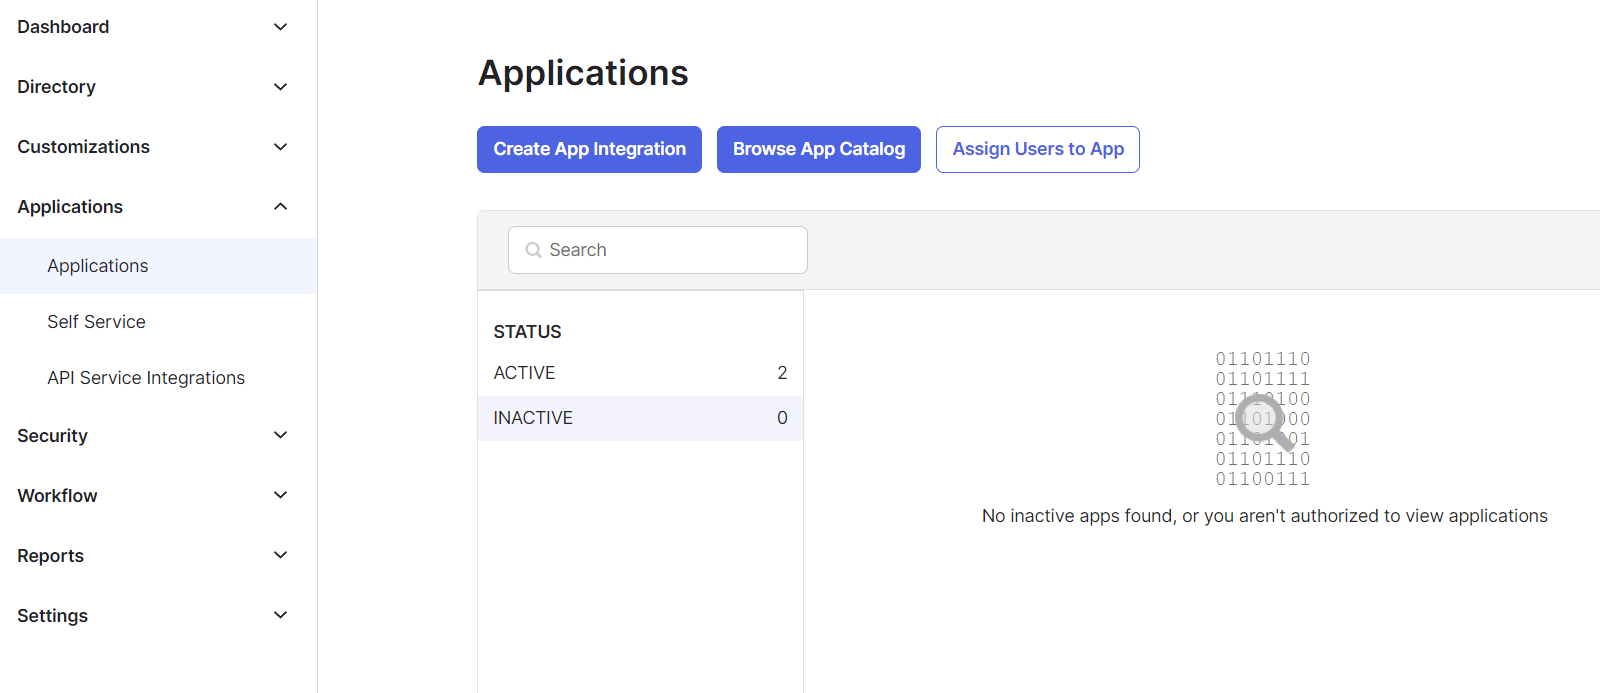
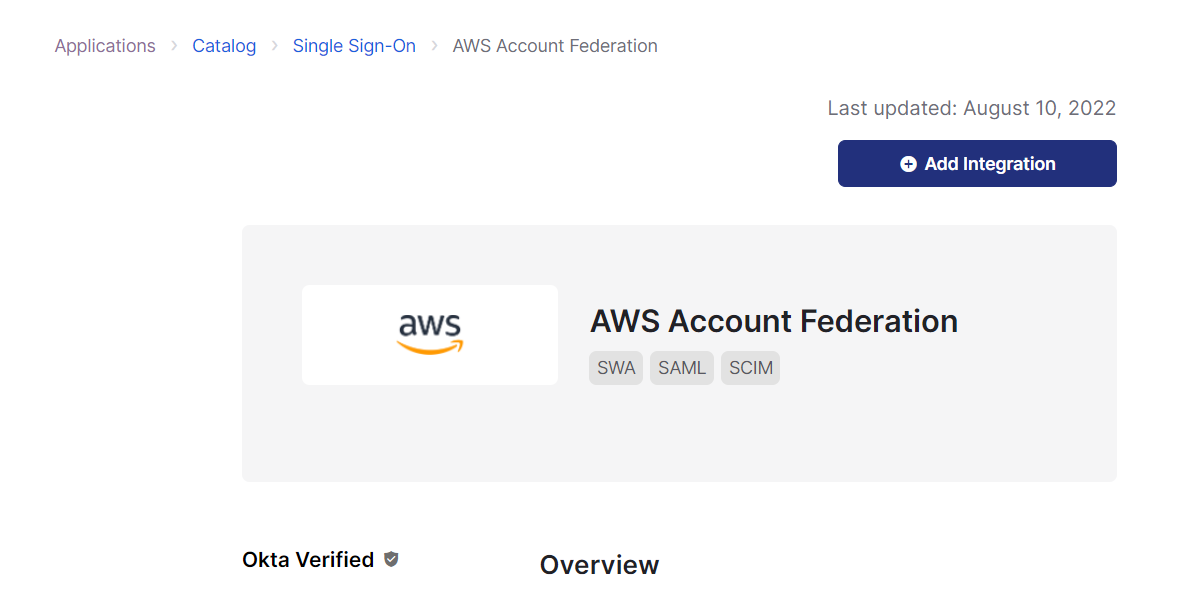
After creating and adding the users to different groups, now let’s move on to integration of Okta and Redshift. Navigate to Applications, click Browse App Catalog and then search for AWS Account Federation. Select Add Integration.
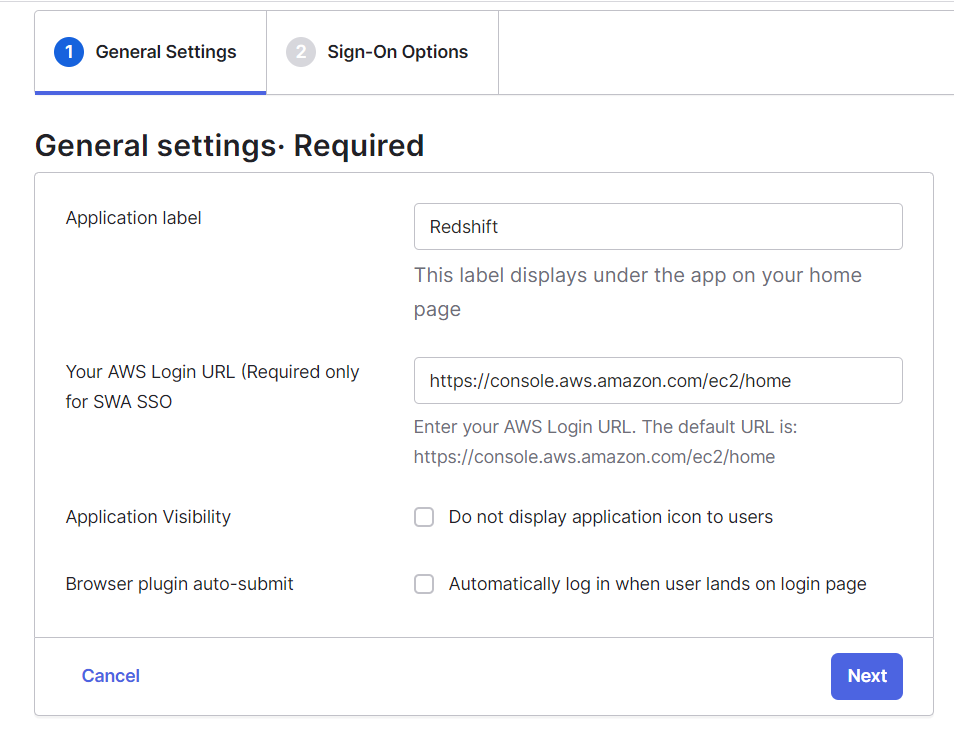
Give the application a name and then click Next.
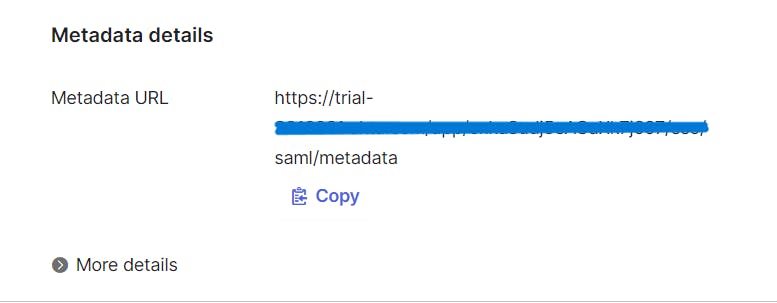
Under Sign-On Options, select SAML 2.0. Enter https://<region>.console.aws.amazon.com/sqlworkbench/home as Default Relay State and then click the Identity Provider metadata link to download the metadata file in .xml format.

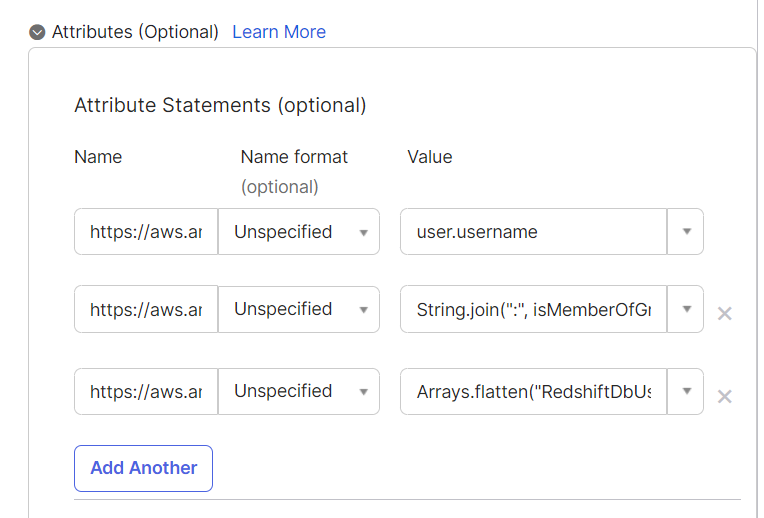
Choose Attributes and set up the following attribute mappings:
Set the DB user using PrincipalTag:RedshiftDbUser. This uses the user name in the directory. This is a required tag and defines the database user that is used by query editor v2.
Set the DB groups using PrincipalTag:RedshiftDbGroups. This uses the Okta groups to fill the principal tags. Its value must be a colon-separated list.
Set the transitive keys using TransitiveTagKeys. This prevents users from changing the session tags in case of role chaining.
These tags are forwarded to the redshift:GetClusterCredentials API to get credentials for your cluster. The following table summarizes the attribute configuration.
| Name | Name Format | Value |
| https://aws.amazon.com/SAML/Attributes/PrincipalTag:RedshiftDbUser | Unspecified | user.username |
| https://aws.amazon.com/SAML/Attributes/PrincipalTag:RedshiftDbGroup | Unspecified | String.join(":", isMemberOfGroupName("admin") ? admin: '', isMemberOfGroupName("hr") ? hr: '') |
| https://aws.amazon.com/SAML/Attributes/TransitiveTagKeys | Unspecified | Arrays.flatten("RedshiftDbUser", "RedshiftDbGroups") |
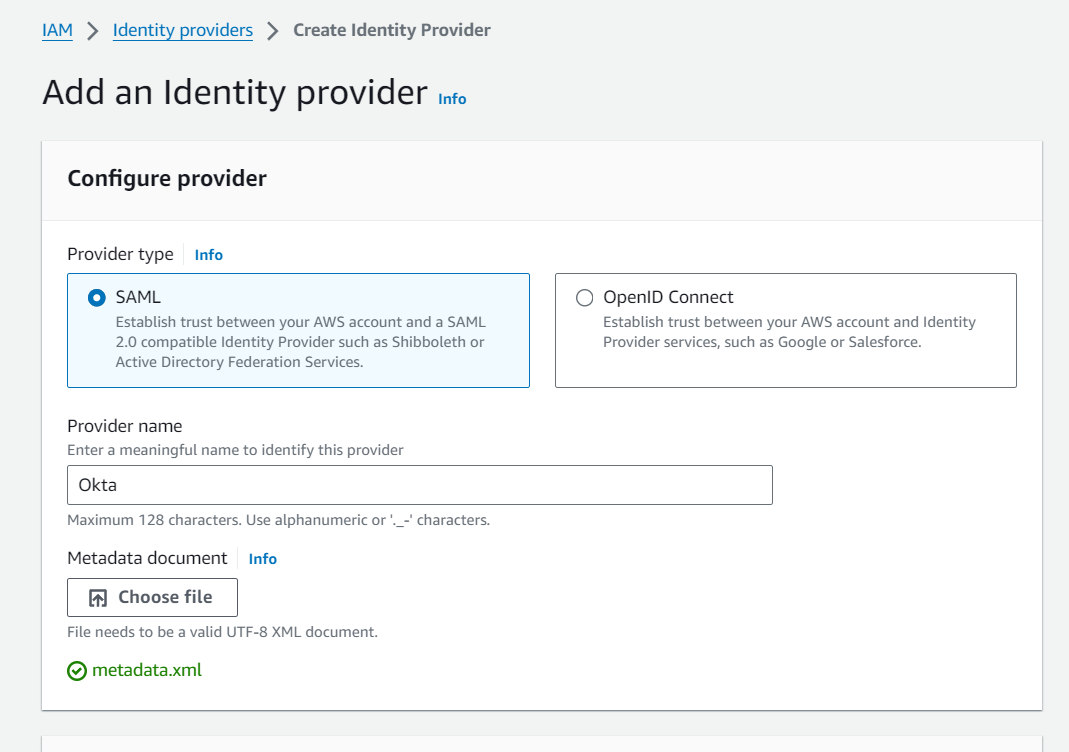
Now save all the settings, we will come back for the advanced settings later. Move on to the AWS Management Console and select identity providers under IAM. Select SAML, give the provider a name and upload the metadata.xml file that you downloaded in the previous step.
Now we create an IAM Policy and edit the permissions as follows. Replace the AWS region, account ID, cluster name and DB groups according to your configurations.
{
"Version": "2012-10-17",
"Statement": [
{
"Sid": "RedshiftClusterPermissions",
"Effect": "Allow",
"Action": [
"redshift:GetClusterCredentials",
"redshift:CreateClusterUser",
"redshift:JoinGroup"
],
"Resource": [
"arn:aws:redshift:<region>:<account>:cluster:<cluster>”,
"arn:aws:redshift:<region>:<account>:dbuser:<cluster>/${aws:PrincipalTag/RedshiftDbUser}",
"arn:aws:redshift:<region>:<account>:dbgroup:<cluster>/admin",
"arn:aws:redshift:<region>:<account>:dbgroup:<cluster>/hr",
"arn:aws:redshift:<region>:<account>:dbname:<cluster>/${redshift:DBName}"
]
}
]
}
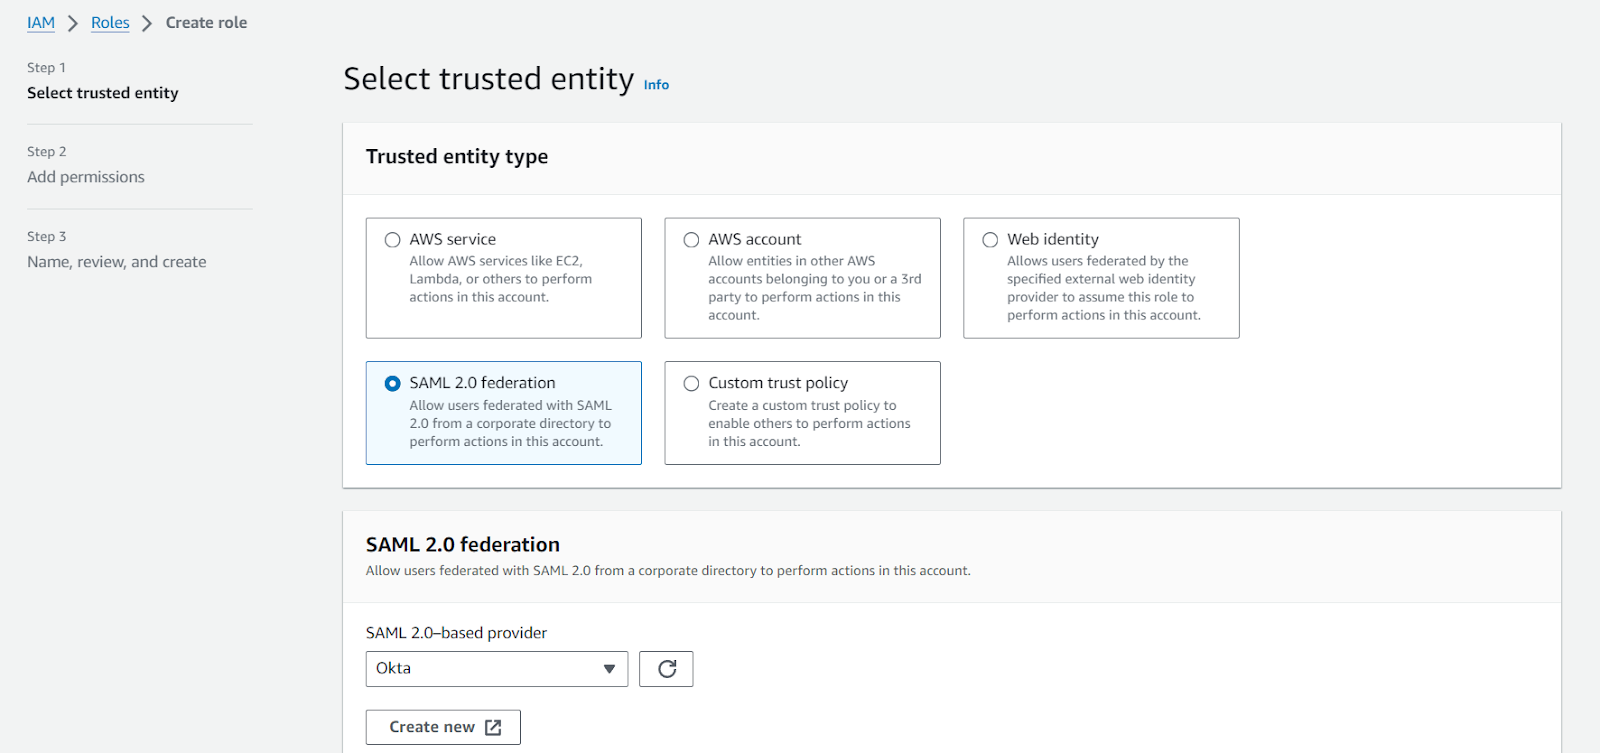
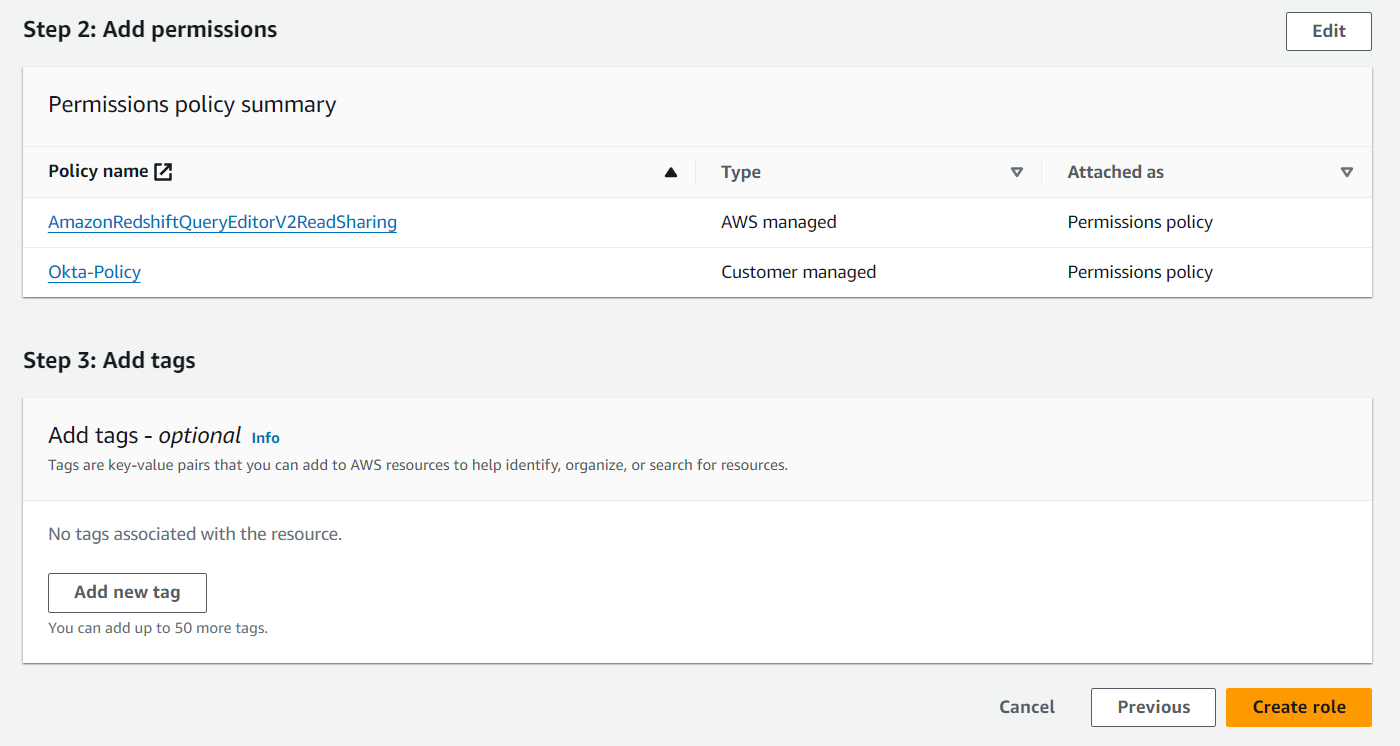
We have to create an IAM Role. Select SAML 2.0 federation, choose the provider from the dropdown that you just created and select Allow programmatic and AWS Management Console access.

Then attach the policy that you just created and also add AmazonRedshiftQueryEditorV2ReadSharing permission to the role.
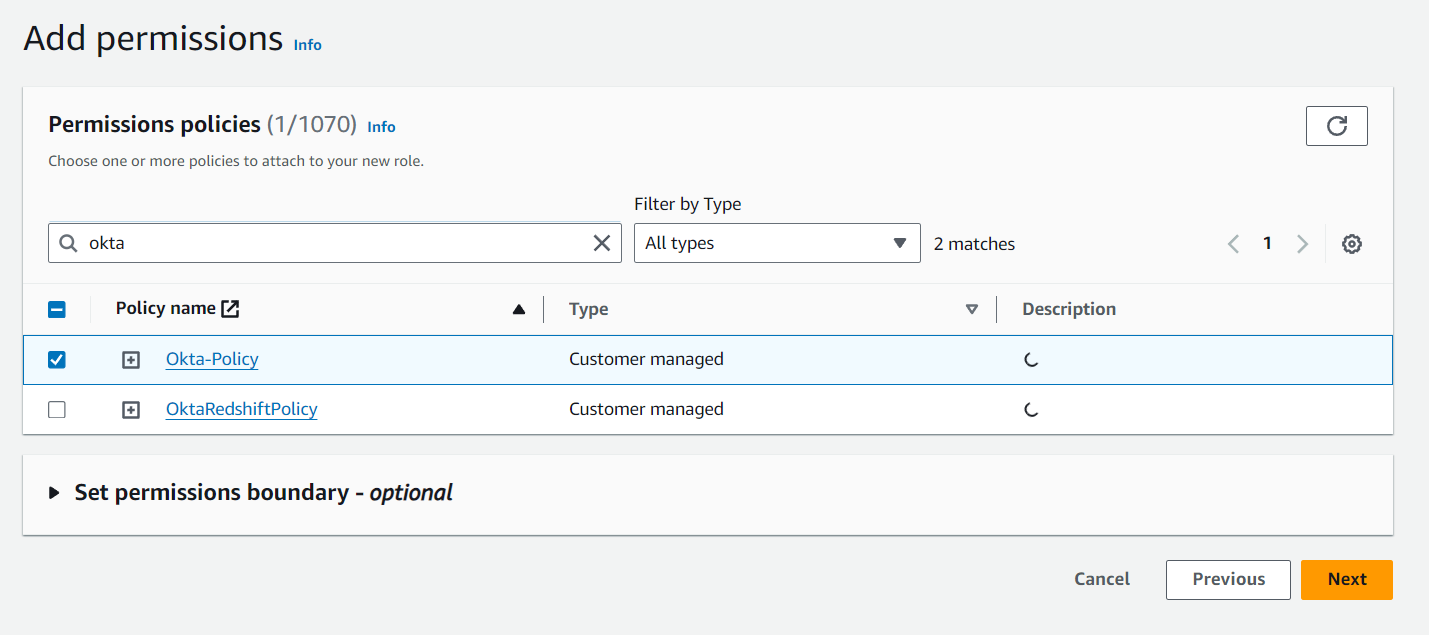
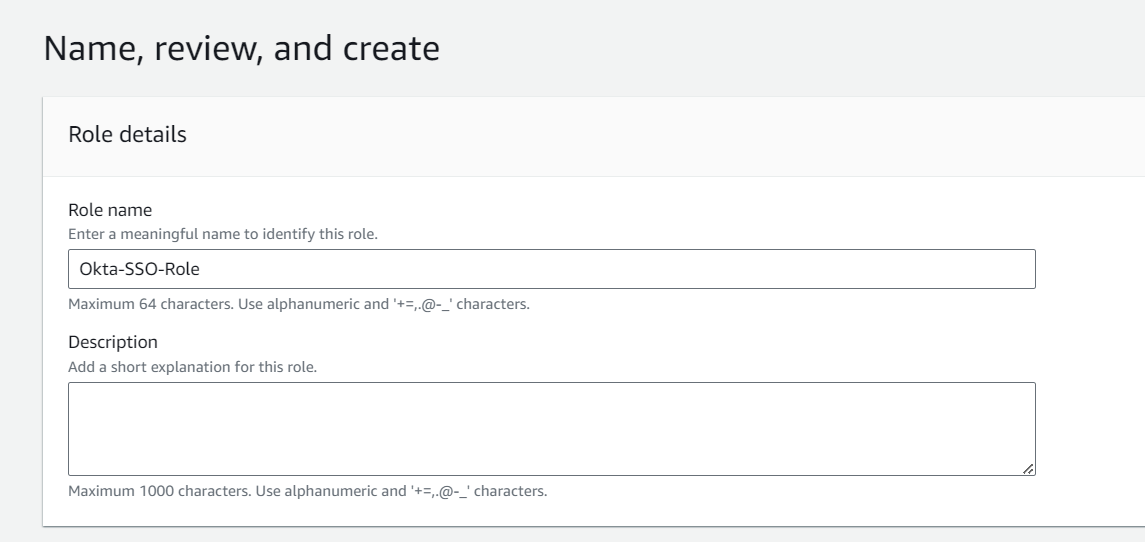
Give the role a name and then create the role.
After the role is created, edit the trust relationship and add sts:TagSession permission.

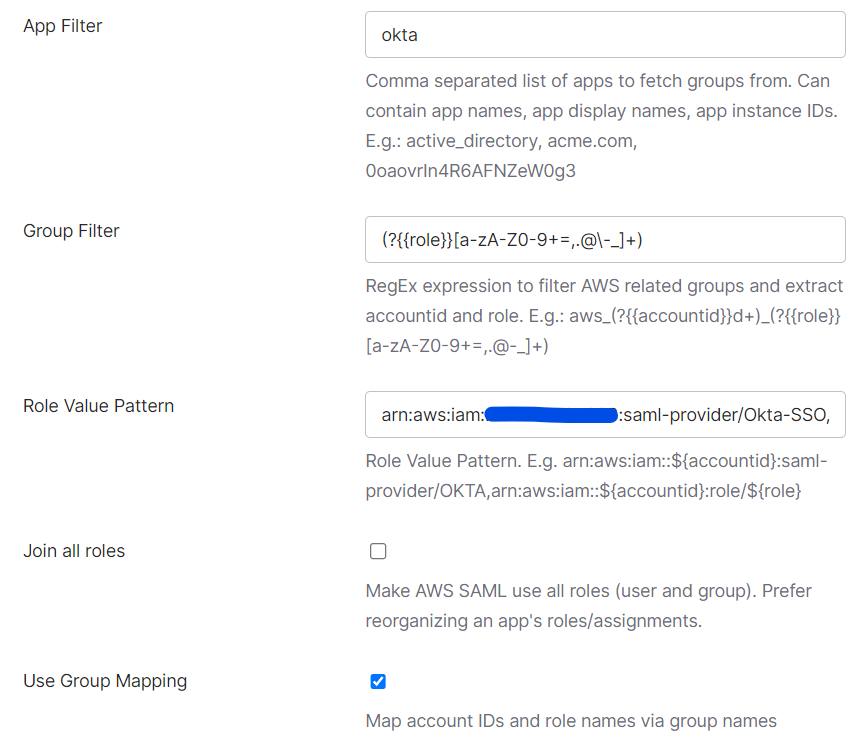
Moving on to the Advanced Sign-on settings in Okta, select Use Group Mapping and Enter the IdP and IAM role ARNs.
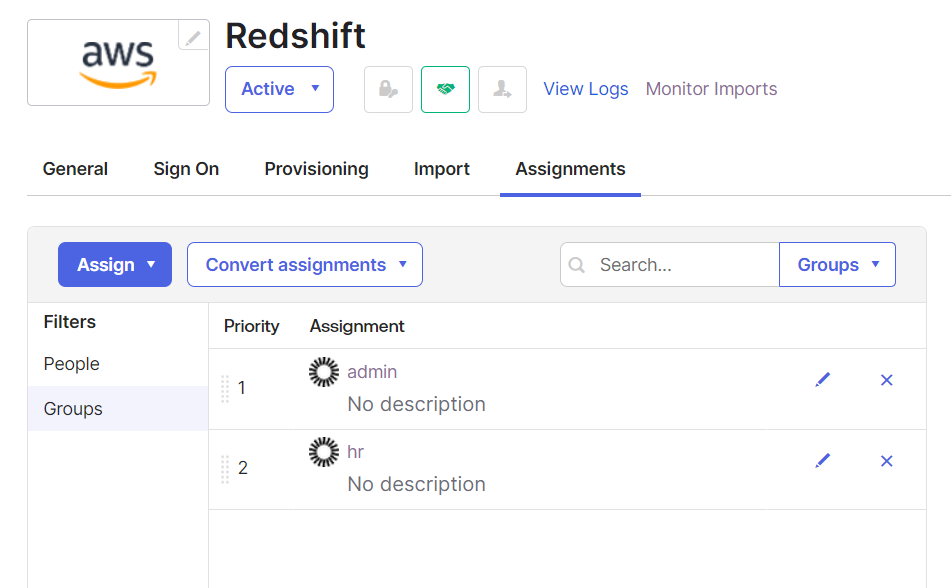
Under Assignments, add the groups created previously.
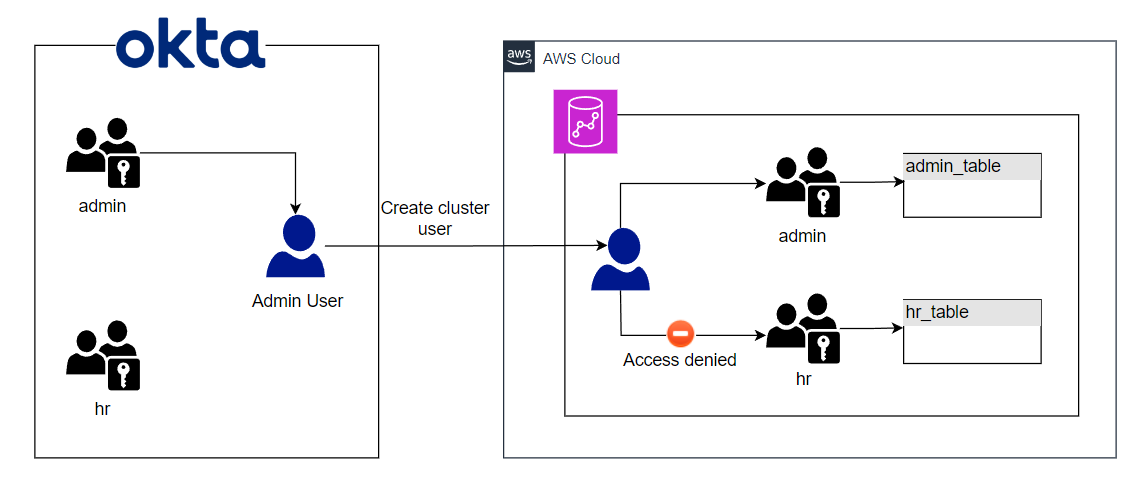
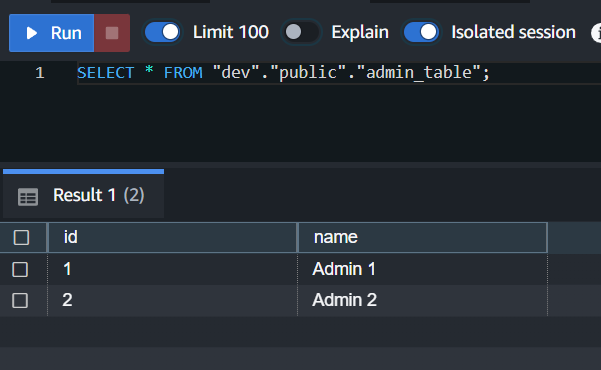
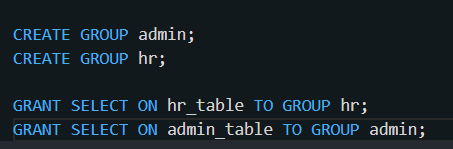
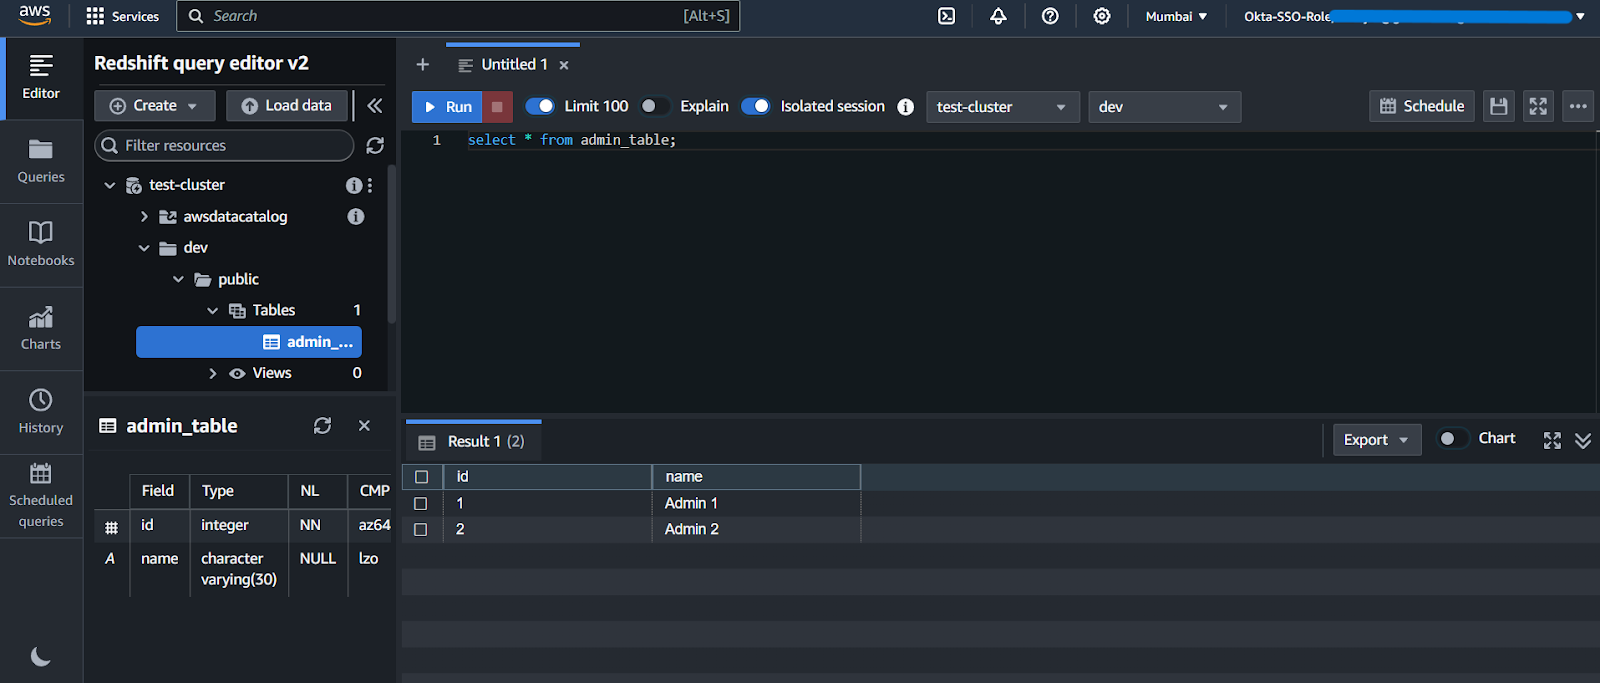
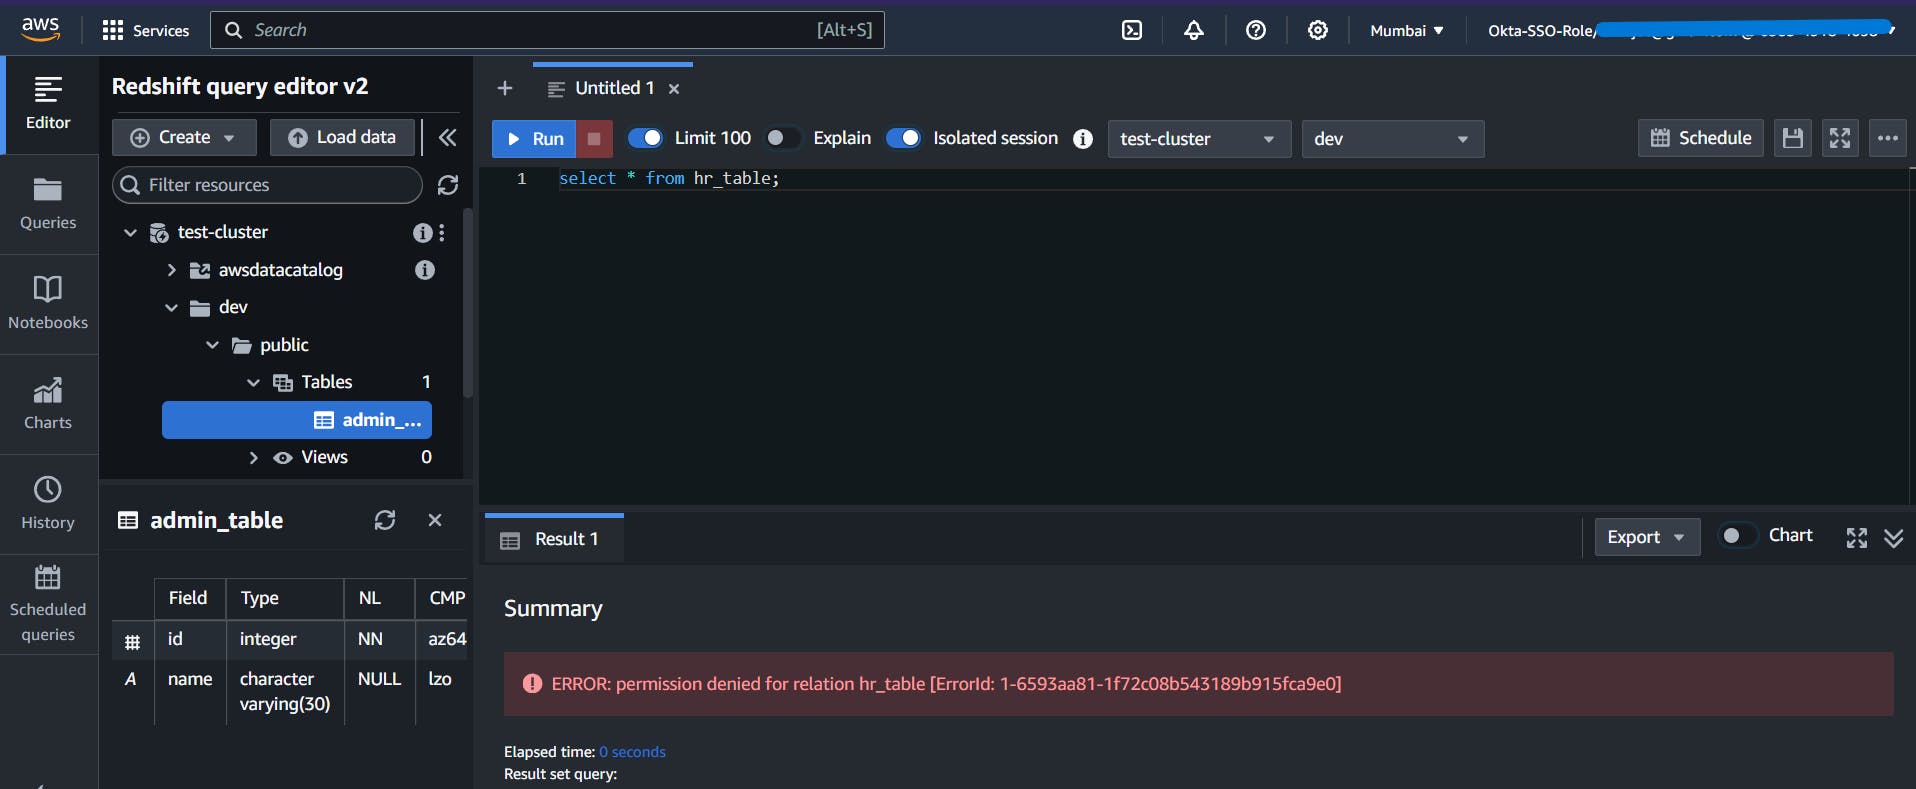
I have created two tables: hr_table and admin_table and given access to hr and admin groups respectively in Redshift Query Editor v2.
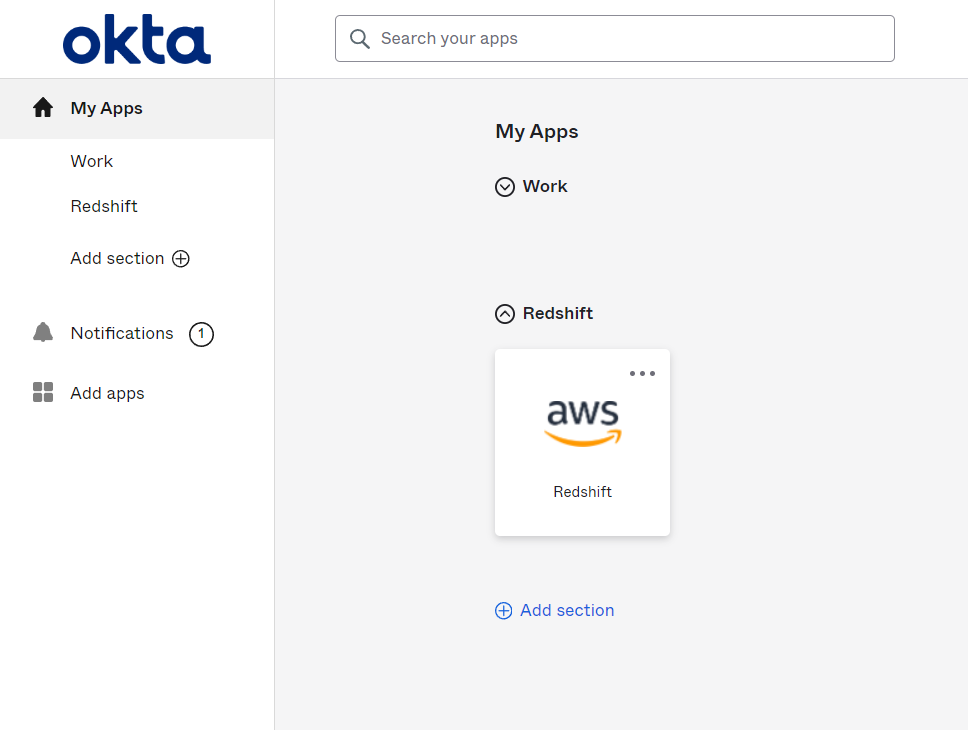
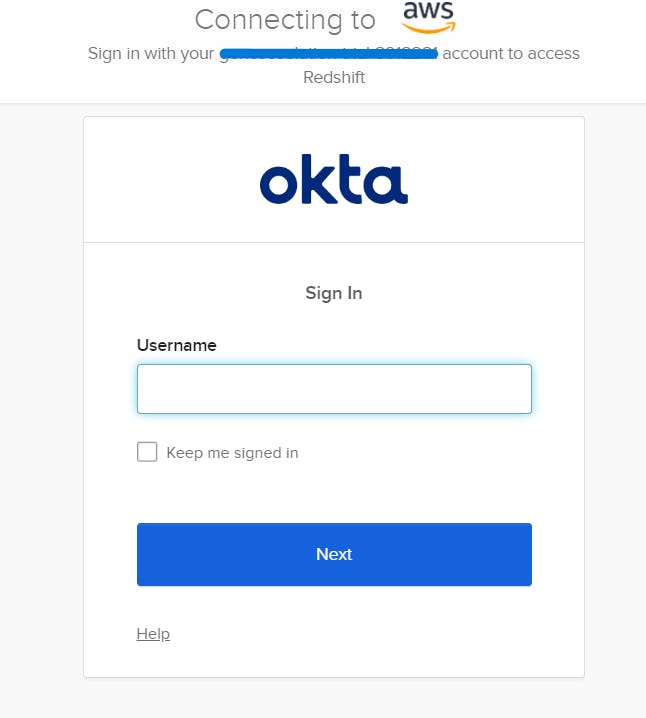
Login to your Okta account and in the dashboard click the application, you will be redirected to the Amazon Redshift query editor v2 URL that you specified as the default relay state.
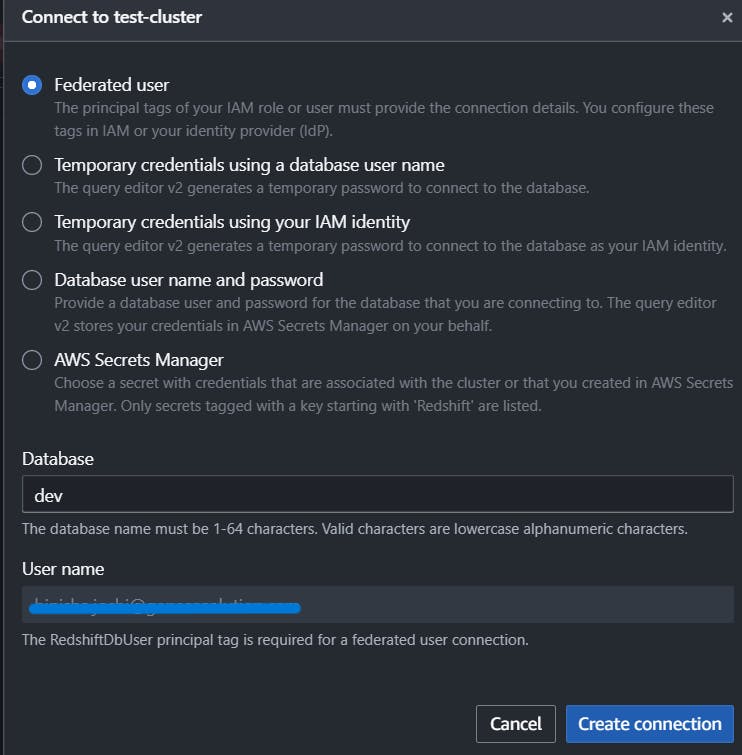
In the query editor, choose your cluster (right-click) and choose Create connection. Select Federated user. The user name is prepopulated with your federated login information. Then create connection.
Now, you have access to the corresponding tables. Here, I have logged in using admin group user, so I have access to the admin_table but not hr_table.
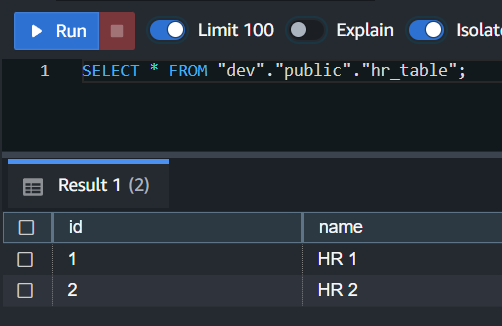
Now I have logged in using hr group user, where I can access the hr_table only and not admin_table.


CONCLUSION
Congratulations! you’ve unlocked the potent duo of Okta and Amazon Redshift for Single Sign-On (SSO) in your organization. As businesses chase simplicity and heightened security, this power coupling delivers a game-changing solution for identity and access management. Okta’s robust SSO capabilities seamlessly blend with Redshift’s data-crunching muscle, empowering modern enterprises to elevate their security posture and user experience.